
Disclosure: This post contains affiliate links. I may receive compensation when you click on links to products in this post. For an explanation of my Advertising Policy, visit this page. Thanks for reading!
How To Make A WordPress Site Public.
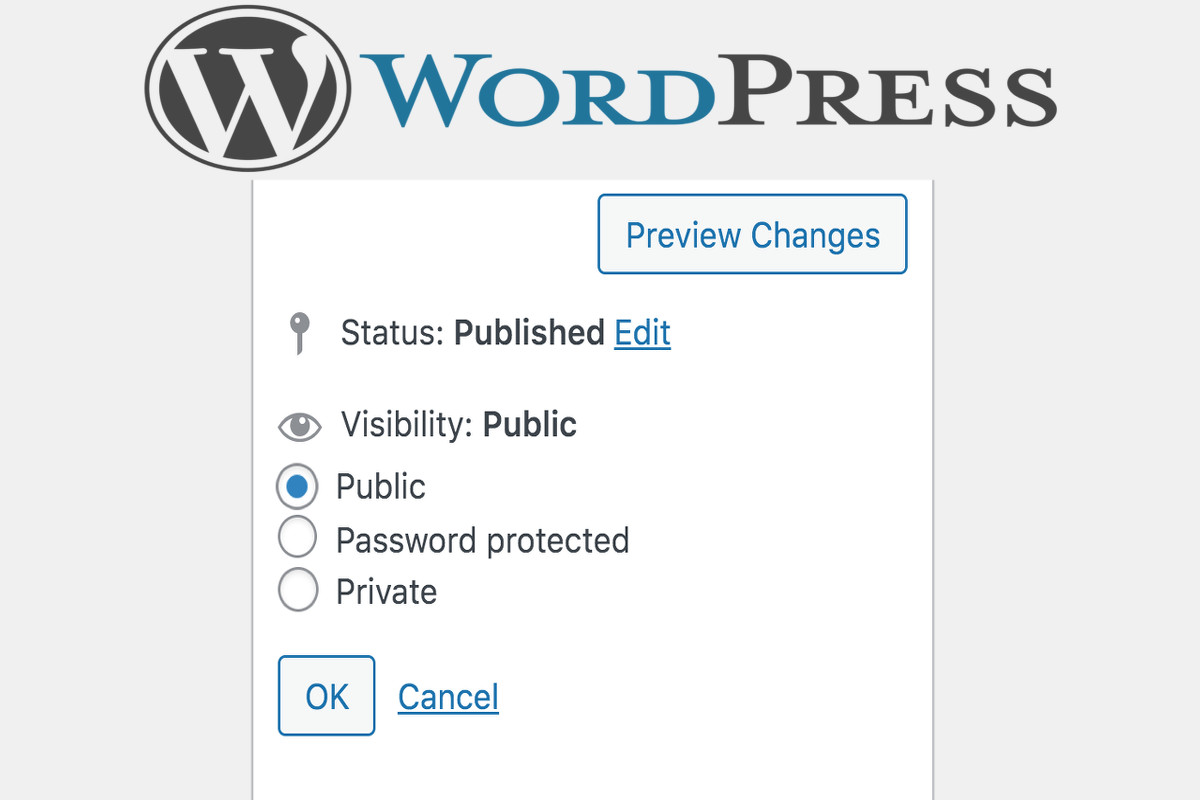
Want to make your WordPress site public? Here are 4 quick and easy steps to do it:
1. Log into your WordPress site.
2. In the left-hand sidebar, under “Settings,” click on “Reading.”
3. Under “Publicize,” make sure that the box next to “Make my site public” is checked.
4. Click on “Save Changes.”
Why Make A WordPress Site Public?
There are a few reasons why you might want to make your WordPress site public.
Maybe you’re an artist or musician who wants to share your work with the world.
Or maybe you’ve started a blog and you’re ready to start publishing posts.
Whatever the reason, making your WordPress site public is a pretty straightforward process.
Here are a few things to keep in mind when making your WordPress site public:
Your Domain Name.
If you haven’t already, you’ll need to purchase a domain name for your WordPress site. This is the URL that people will type into their browser to visit your site.
You can purchase a domain name through WordPress.com or through a third-party provider like GoDaddy or Hover.
Once you have a domain name, you’ll need to set it up with WordPress.
Your Privacy Settings.
By default, WordPress sites are set to private, which means that only people who are logged in to WordPress can see the site.
If you want to make your site public, you’ll need to change the privacy settings in your dashboard.
To do this, go to Settings > Reading and change the option from “Discourage search engines from indexing this site” to “I would like my site to be visible to everyone, including search engines.”
Choose A Theme.
One of the great things about WordPress is that there are thousands of themes available for free and for purchase.
A theme is basically a template for your site that determines how it looks and functions.
You can browse through themes in the Appearance section of your dashboard. Once you’ve found the one you like, click “Install” and then “Activate.”
Create Content.
Now that your site is live and public, it’s time to start creating content! If you’re running a blog, this will mean publishing new posts on a regular basis.
If you’re using your site to showcase your work, you’ll need to upload images or videos of your work. And if you’re selling products or services, you’ll need to add those products or services to your site.
Regardless of what kind of site you’re running, though, creating fresh content is essential if you want people to keep coming back.
Making a WordPress site public is a simple process that can be completed in just a few steps.
First, purchase a domain name and set it up with WordPress.
Then change the privacy settings in your dashboard so that everyone can see the site.
Next, choose and install a theme. And finally, start creating content!
By following these steps, you can have a great-looking public WordPress site up and running in no time flat.
Some Pros And Cons To Consider When Making A WordPress Site Public.
Of course, there are some pros and cons to making your WordPress site public.
On the positive side, making your WordPress site public allows you to reach a wider audience with your content.
It also makes it easier for people to find your website through search engines like Google. This will result in:
More Traffic To Your Site.
If you make your WordPress site public, you are likely to see an increase in traffic.
This is because when your site is public, it is indexed by search engines like Google and Bing, which makes it more visible to potential visitors.
Additionally, making your site public also allows people to share your content on social media, which can help to increase its reach.
More opportunities for feedback.
Making your WordPress site public also gives you more opportunities for feedback.
This is because when your site is public, people can leave comments on your posts and pages.
This feedback can help understand what people like and don’t like about your site, and can help you to improve it over time.
However, there are some downsides. For example, making your WordPress site public can expose it to security risks.
Increased security risks.
One of the potential downsides of making a WordPress site public is that it can increase your security risks.
This is because when your site is public, it is more vulnerable to attack from hackers who may try to gain access to your site in order to insert malicious code or steal sensitive information.
Additionally, making your WordPress site public also means that anyone can see the code that powers your site, which could give hackers clues as to how to exploit any vulnerabilities that may exist.
So if you’re going to make your WordPress site public, be sure to take some steps to secure it first.
Conclusion.
Overall, whether or not you make your WordPress site public is up to you. If you decide to do it, follow the steps outlined in this post to get it done quickly and easily.
And if you’re still undecided, consider the pros and cons before making a decision one way or another.
